 First…SAFETY!
Before helping your little one learn how to maneuver any mobile device, ALWAYS make sure they have a properly fitted helmet. This means being sure it is sized and sits on your child’s head properly. Also, keep in mind that the most important factor for a child to learn how to ride a bike is that they are ready and interested in learning.
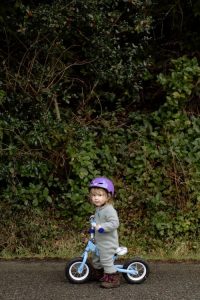
Wearing a Helmet
Note: A helmet is recommended at all times when riding a bike – even when riding down the driveway.
Size: Your child’s helmet should fit snuggly, without moving, when strapped in place. You can add or remove the sizing pads that typically come with the helmet to improve the fit.
Position: A bike helmet should always be sitting flat on the top of your child’s head and rest 1-2 finger widths above their brow line.
Securing the helmet: The straps on either side of the helmet should be adjusted to form a “Y” with the straps coming together just below each ear. Once buckled, you should not be able to fit more than one finger between the strap and your child’s chin.
TIP: Check the fit of your child’s helmet often. Adjustments will need to be made as your child grows to provide optimal protection.
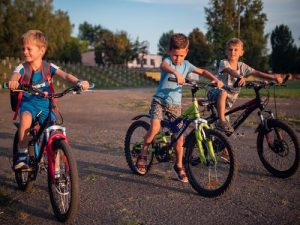
 The Bike
Size: To be sure your child’s bike is the right fit for them, your child should be able to comfortably stand with feet flat while straddled over the center bar of their bike.
- Handlebars: Adjust the handlebars to a height that is comfortable for your child and allows them to sit upright while riding.
- Seat: Early learners benefit from having their feet flat on the ground while sitting on their bike. This allows them to stop easily using their feet. As your child gains more experience, you can raise the seat so that their tip toes tough the ground when sitting on their bike. Raising the seat improves the position of their legs while pedaling and makes pedaling more efficient.
TIP: Avoid using a bike that is too big for your child; this can delay learning as larger bikes are typically more difficult to control. You can always stop at your local bike store to ask for assistance with bike fitting.
Balance: Balance is a key component to being able to ride a bike and, as the name implies, a balance bike teaches your child to balance on two wheels before introducing pedaling. Also, learning to pedal a bike can happen sooner when a child has learned to ride a balance bike first. No matter the age your child begins learning how to ride a bike, we recommend you skip the training wheels! Teaching your child to glide (coasting with feet off the ground) on a bike pushing with their feet before using pedals, is a much more effective way to learn to balance, a key component for learning to ride a bike. Regardless of your child’s size, you can always remove pedals from a standard bike and lower the seat while teaching your child to glide and balance.
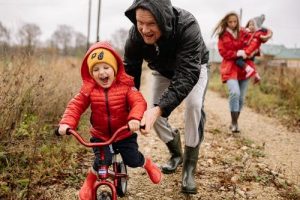
 Getting Started
Start on a smooth trail, in an empty parking lot, or on a cul-de-sac so there is plenty of space to learn and so you and your child won’t have to worry about traffic or other obstacles. And remember – keep it fun! Focus on success and let your child practice at their own pace, biking as much or as little as they’d like. You can help keep the experience a positive one and your patience, encouragement, and excitement for their learning will go a long way! The following steps are important for developing balance and confidence in bike riding.
TIP: Encourage your child to look up and forward throughout each phase of learning to ride a bike. Looking down can lead to moving your child their handlebars unintentionally and throw them off balance.
Step 1: First teach your little one to how to walk beside their bike. Once they are comfortable, you can teach them to step one leg over the bike, steadying the handle bars as they practice getting on and off their bike. As they become more independent, have them lean their bike toward them just a little when stepping over the bike for easier mounting.
Step 2: After successfully mounting and dismounting, teach your child to walk while sitting on their bike. Your child can alternate their steps or move their bike forward by pushing with both feet at the same time. As they gain more confidence your child will learn to glide, coasting with both feet up for longer distances. It may take some time for younger riders to remain seated as they’re learning, but they’ll get it.
Step 3: Your child can glide so let’s practice turning! You and your child can create a simple obstacle course for them to practice their turns. Make sure there is plenty of space for big turns initially then increasing the challenge with more elaborate obstacles.
And there you have it – with your patience and guidance, your little one will be motoring along before you know it!
Be sure to stay tuned for an upcoming bike safety workshop and an outdoor bike clinic geared towards helping you teach your child how to ride a balance or pedal bike hosted by PPTS this June.
References:
REI co-op, Bicycling.com
https://www.rei.com/learn/expert-advice/teach-child-to-ride-a-bike.html
National Highway and Safety Administration
https://one.nhtsa.gov/people/injury/pedbimot/bike/KidsandBikeSafetyWeb/index.htm
Blog written by Jen Leonard, PT, DPT